Quick Start Guide
1. Download The Development Kit & HubTool
Download the BrainStem Development Kit (BDK) for your particular operating system and architecture.
Download HubTool for your particular operating system and architecture.
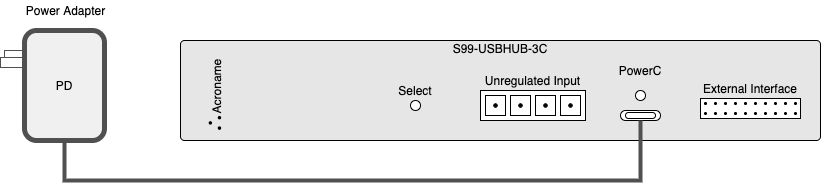
2. Connect Power
Using the provided Power Delivery (PD) brick/wallwort and the USBU 3.0 C-C cable make a connection between it and the Power-C port located on the back of the USBHub3c.
Plug the PD Brick into a 120/240V AC outlet.
3. Connect Data
With a second USB 3.0 Type-C cable make a connection between Port “0” and the your host computer.

4. Play
Open HubTool
On the bottom right side of the application select the USBHub3c device.
Note
Linux users will need run the script labeled “udev.sh” located in the “BrainStem_linux_Driverless” folder before they will be able communicate with a BrainStem device.
Congratulations! You are now ready to start exploring the capabilities of the USBHub3c. For more information please take a look at our Getting Started Guide