The problem with USB TESTING
Suppose you’re a test engineer working on USB compliance testing. You have a well-equipped lab with some high-end test equipment. But you’d rather be in your office doing other work than in the lab plugging, unplugging, and flipping cables while stepping through test scripts.
The solution
Acroname USB-C switch lets you virtually swap equipment, cables, connect, disconnect, and even perform cable flip tests. Even remotely!
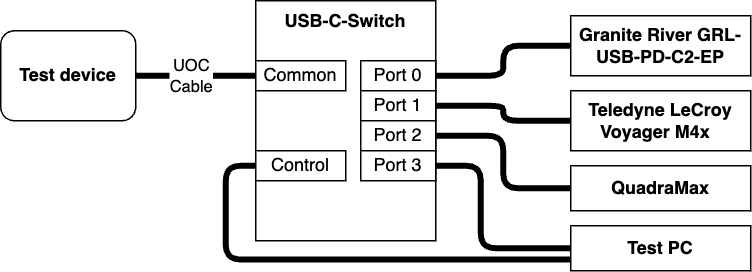
Here’s a hypothetical setup to test a USB-PD device. USB-PD testers can give different results, so in this case you want to test against three test instruments and also connect the device to the test PC to download device logs, flash firmware or upload OS images. VNC to the Test PC from your office, or use HubTool on your local computer connected to the Test PC by aEther.
Device connections:
| Port | Connection |
|---|---|
| Mux 0 | Tester #1: The excellent Granite River GRL-USB-PD-C2-EPR |
| Mux 1 | Tester #2: The reference standard Teledyne LeCroy Voyager M4x |
| Mux 2 | Tester #3: QuadraMax (sink only) |
| Mux 3 | Test PC |
| Control | |
| Common | Device Under Test |
- The Test PC is running the control apps for each instrument, along with HubTool to control the c-switch.
- Control the Test PC over VNC or Remote Desktop from the relative comfort of your office (or hotdesk -- we’re sorry!)
Note: the USB-C-Switch supports up to 100 W PD. For higher-power USB-PD EPR testing, you’ll still need to hoof it back to the lab.
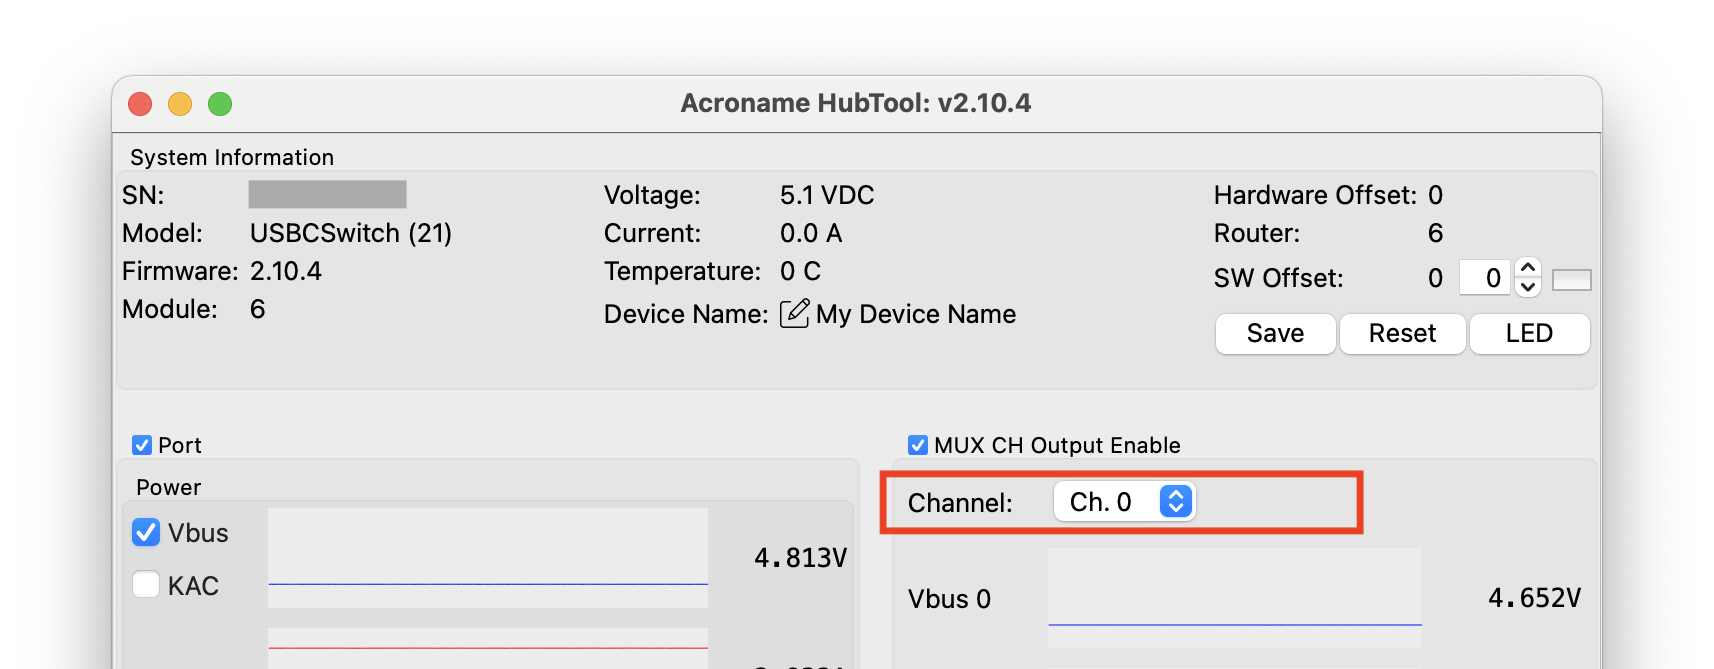
HubTool mux port selection

Virtual cable flip toggle
Example Workflow:
- In HubTool, switch the mux channel to port 3 to connect the device to the Test PC
- Upload the firmware to test
- For each instrument to test:
- In HubTool, select the corresponding mux port of the instrument
- Select the desired cable orientation
- Start the instrument’s test sequence.
- Use the USB-C switch to unplug / plug or cable flip as needed
- In HubTool, select the Test PC mux port
- Download device log
If you’re doing a lot of identical tests, it may be worth scripting the whole thing. USB-C Switch is easily controllable via the Brainstem API, but be aware that the instrument control software can be more challenging to automate.
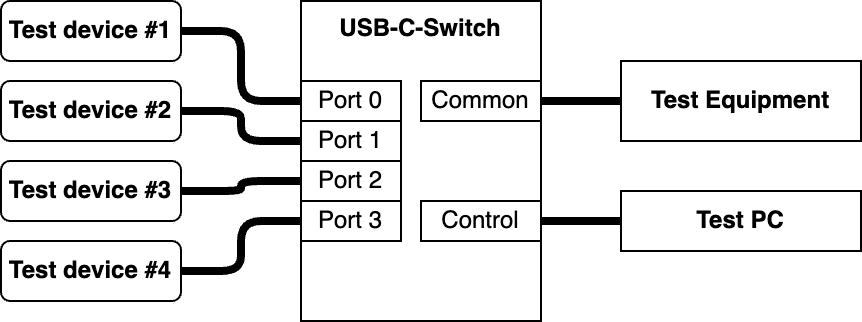
But I want to test multiple ports or devices on one tester!
No problem, just flip the USB-C-Switch around so that the test devices are on the mux ports and the tester is on the Common port:
But I want to test multiple devices on multiple testers!
You'll just need to connect two USB-C-switches by their Common ports:
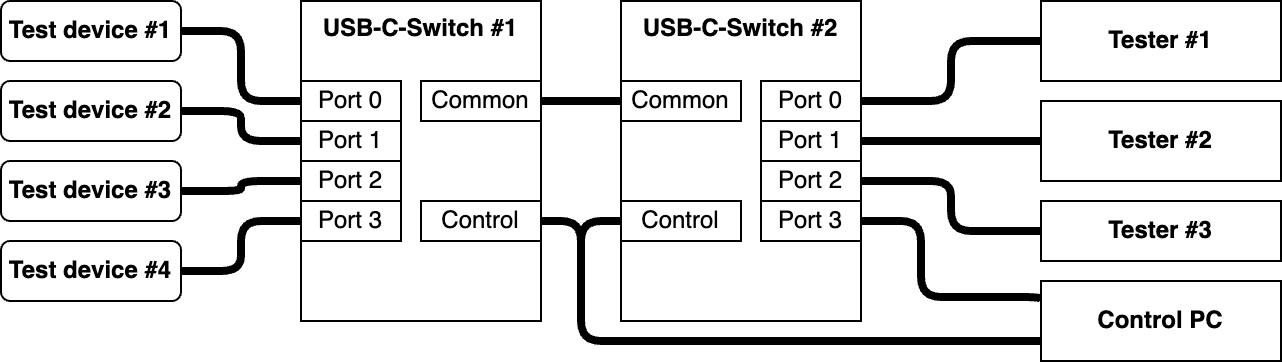
To control a USB-C-Switch, select it in HubTool, where you can control one C-Switch at a time. This is a good time to set a custom name for each switch to remind you which is which rather than memorizing the serial numbers.
For example, to connect "Test device #1" to "Tester #3" using HubTool:
- Select the device-facing C-Switch
- Select mux port 0
- Select the tester-facing C-Switch
- Select mux port 2
Hopefully we've given you some ideas about how to make better use of your test equipment, and how to spend less time plugging and unplugging!
Add new comment