TeraRanger Evo Thermal 90 Sensor - Quality Control Case Study
Terabee recently released a game-changing thermal camera called the Evo Thermal 90.
This unit is technically an IR camera with a 32x32 resolution. So you’re not going to get high-quality images, but instead, it allows you to have a powerful, programmable camera that can serve as a sensor to monitor temperatures.
The standard unit is offered with USB connectivity, although UART and I2C connections are also available. The UART and I2C interfaces are perfect for integrating with a low-cost microcontroller. We chose to use the USB version as it’s plug-and-play with the devices we’re running (computers).
Plus, with Python, we get the ability to run universal code across Mac, Windows, Linux, or any other platform that we’d like.
Here’s a quick rundown:
How We Use It
At Acroname, we sell products that we love to use. To date, we have two use cases for the TeraRanger Evo Thermal sensors in our R&D and production testing.
MTM-Load-1 Temperature Monitoring
As part of our quality control, we need to ensure that MTM-Load-1 units are ready for shipping. Part of this process is to use the TeraRanger Evo Thermal 90 to monitor the temperature of the MTM module to look for “hot spots” that could occur during manufacturing. The most common issues are a poor connection to the heat sink or defective fans.
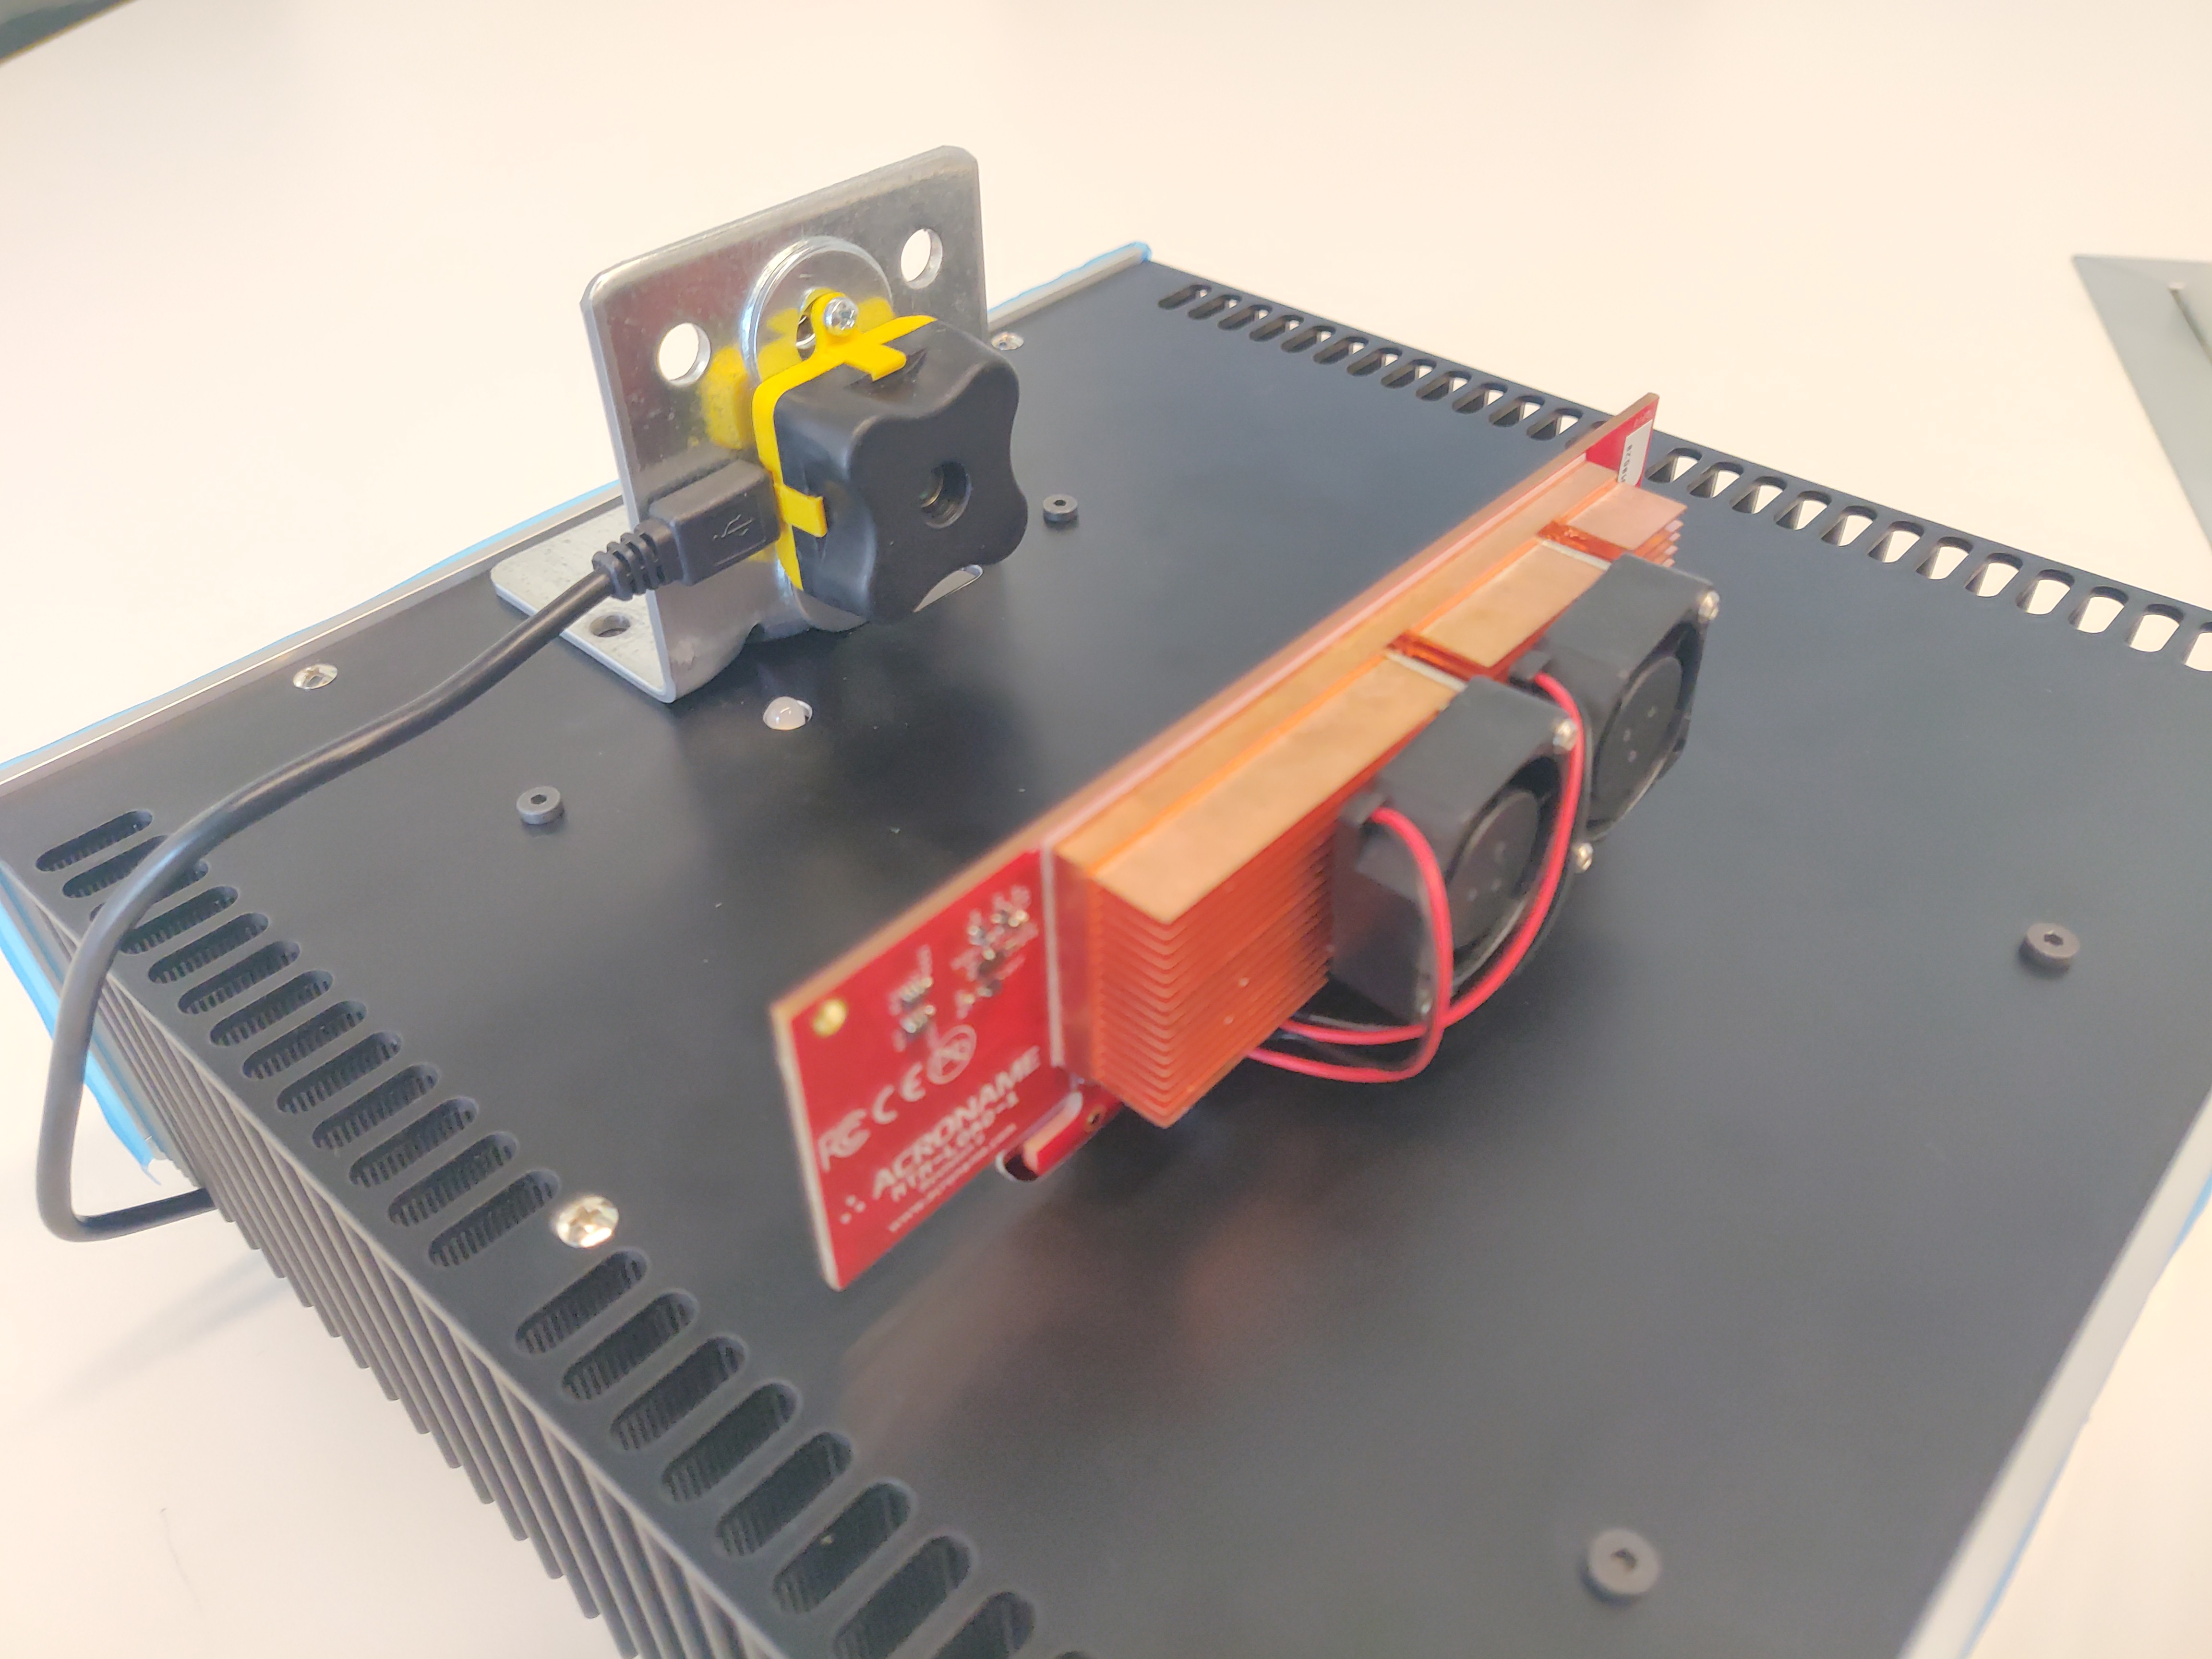
To do this, we installed the sensor on a bracket giving an appropriate view of the MTM module. Then we just plugged the sensor into the USB port on our control computer.
Once connected, the Evo shows up as a virtual COM device for a simple interface as a serial device. Terabee also offers a Windows GUI software. We started with that software package to get an idea of what the unit was capable of and then integrated it directly with the serial stream.
They also provide example code in Python. To get the unit to do what we wanted, we used their starter code and customized it for our needs.
For us, we weren’t using the camera as a camera but focused on its ability to sense temperature changes. We mounted it about 3 inches from the module under test on a small bracket.

From there, the Python code monitors the temperature of the module under test while sending various electrical power loads through the MTM module. If the temperature in any of the pixels moved above a predetermined threshold (such as 100˚C), the code triggers a test failure which can be investigated and corrected.
The Evo Thermal sensor is perfect for this setup because it is far easier to automate than a typical, off-the-shelf laser temperature sensor. And although we have a FLIR camera, this system is far too expensive and difficult to interface with. Plus we’d need to set up a tripod and the software programming would need to be more elaborate.
The basic script allowed us to do a few things:
- Ask for all pixel values at any point. This allowed us to either return the raw values to plot changes over time or set up a max threshold to trigger an alarm so we could investigate further.
- Using Terabee’s python scripts, we are also able to use the values to quickly generate a 32x32 image of what the camera is seeing. Although not required in this case, it is useful to get a heatmap (literally) of what the camera sees for some applications.
This simple setup is now a core part of our quality control system for our MTM-Load modules.
USB-C Hub Testing
In addition to the final-assembly test of our MTM modules, the TeraRanger Evo 90 became a part of our functional testing and validation for our USBHub3c.
All devices, especially industrial devices, must meet jurisdictional requirements and specifications. One of those is case temperature to ensure the unit doesn’t overheat, cause burns to the touch, or otherwise be a heat hazard or fire risk. All countries are a bit different, but these standards are generally unified under ISO or ASTM standards. In order to be approved, the unit has to go through rigorous testing to ensure those standards are met.
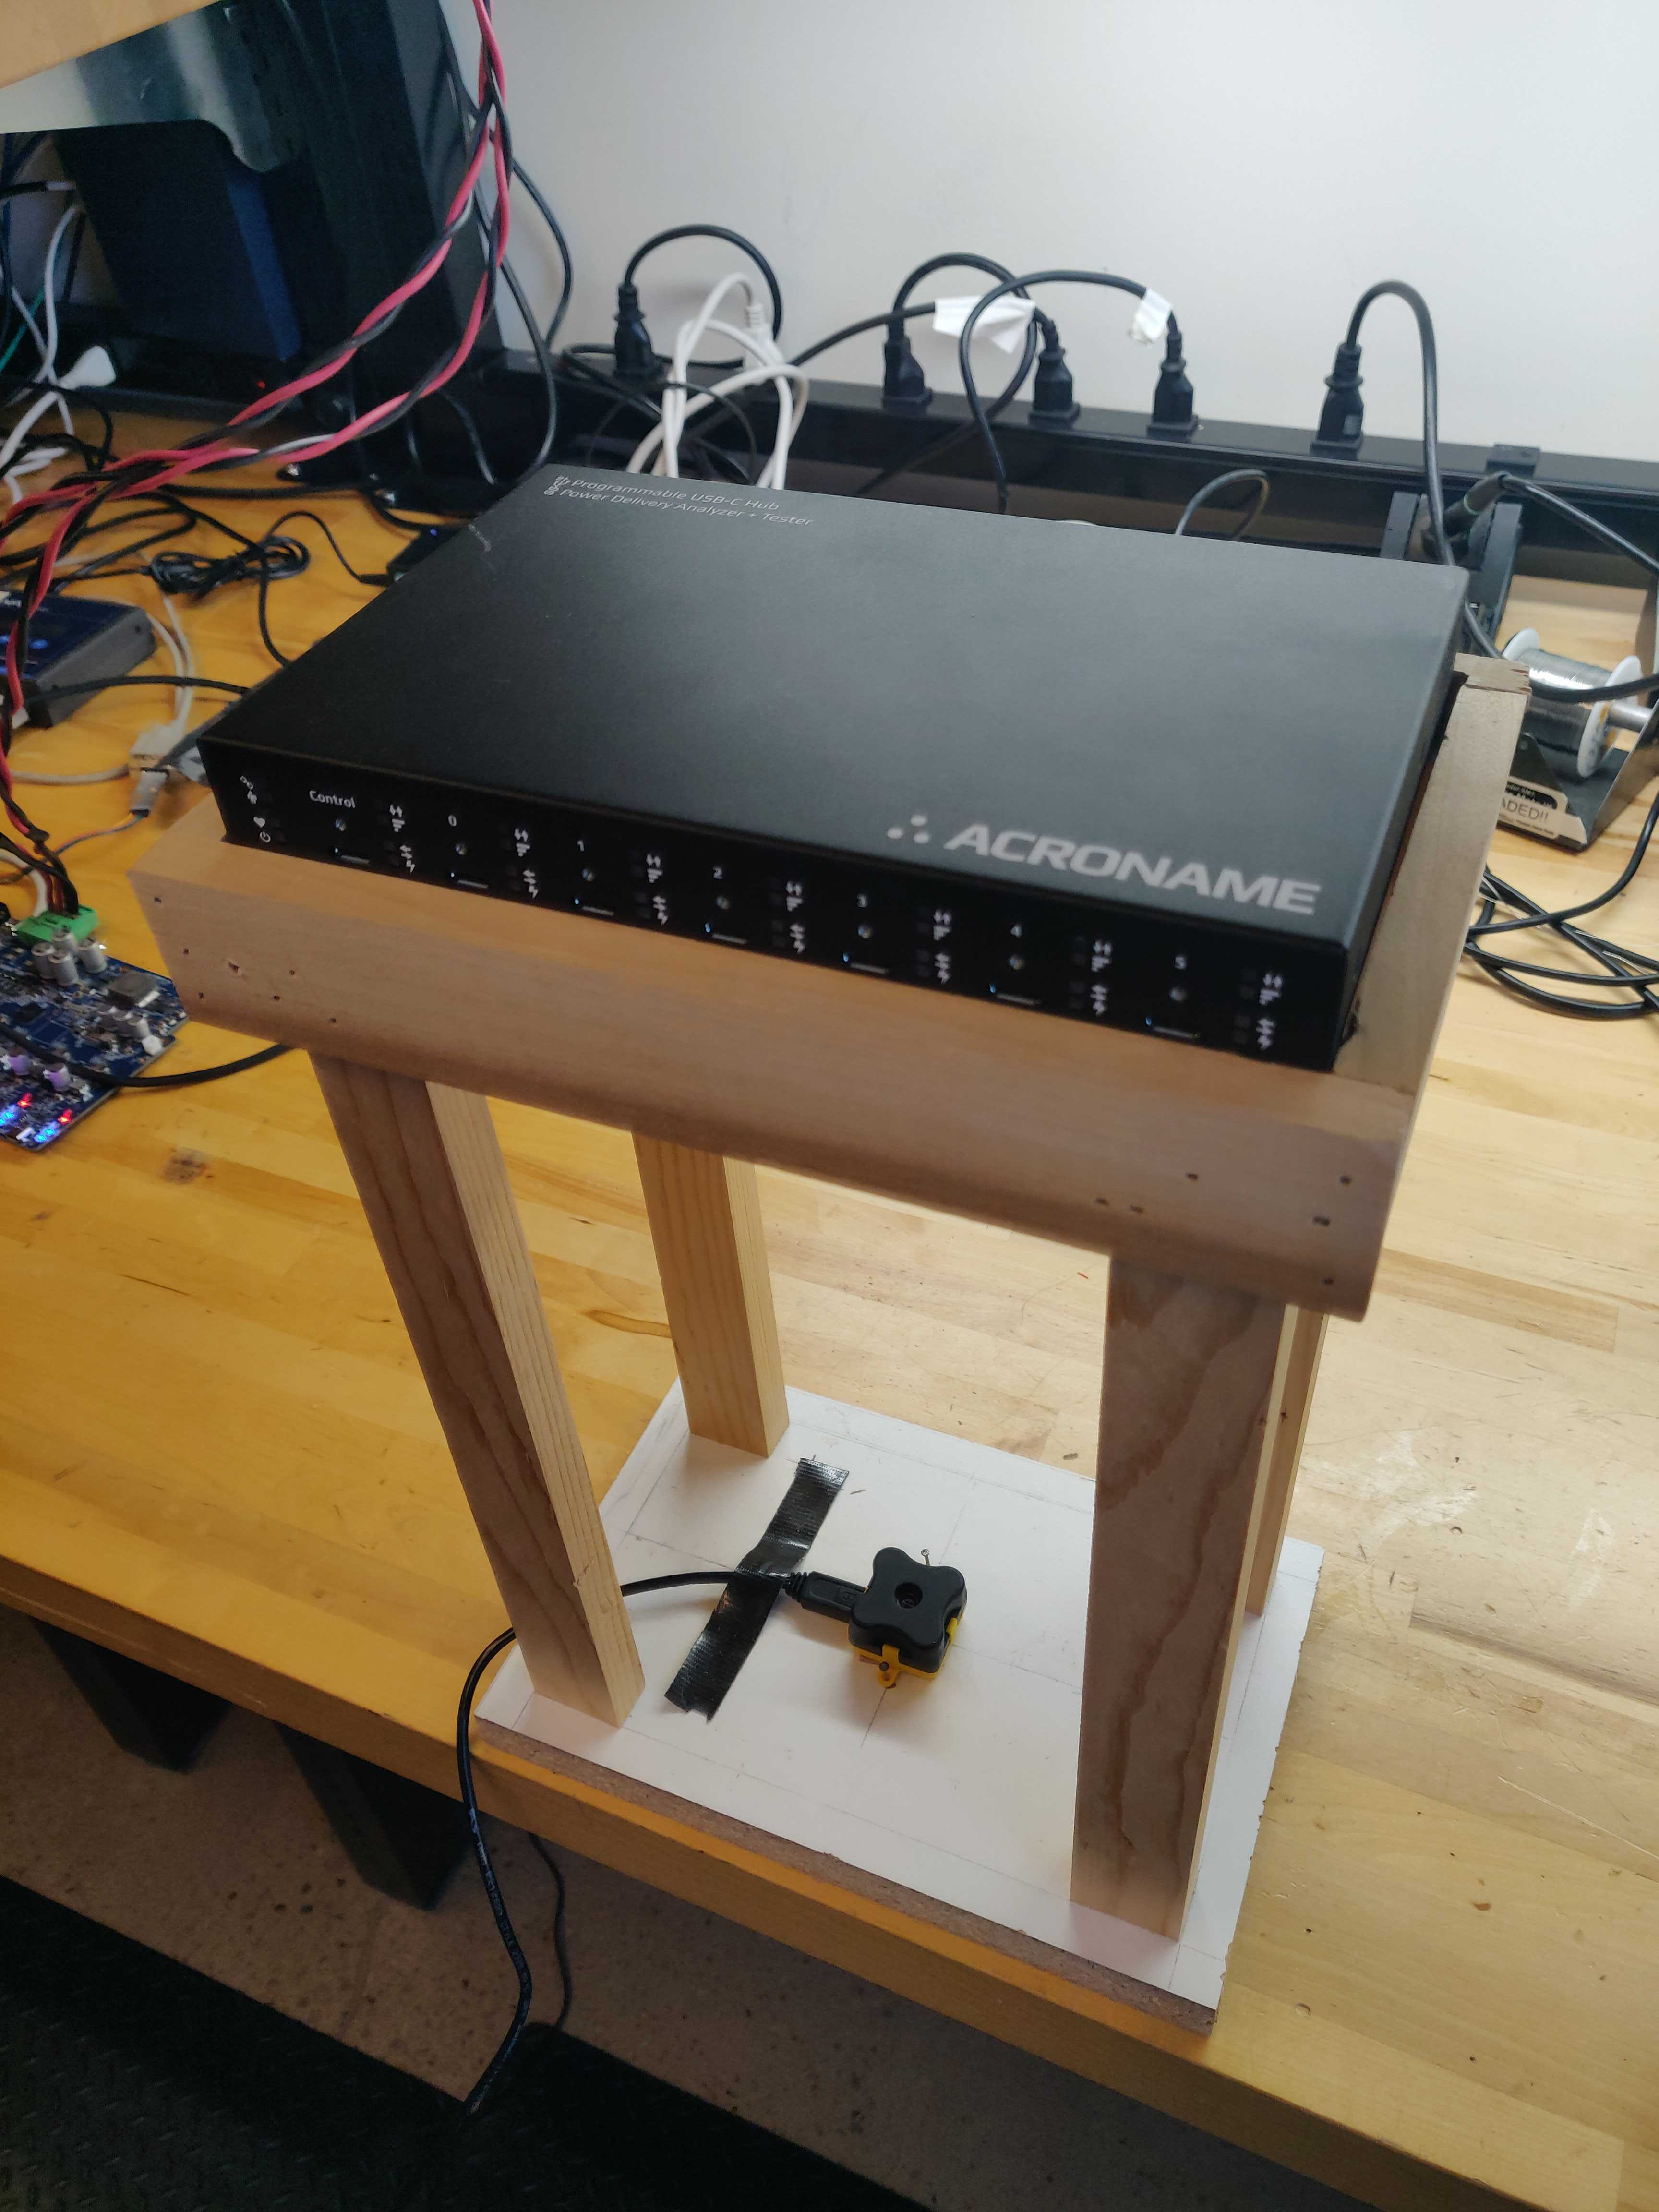
Like our MTM final-assembly test setup outlined above, we deployed the Evo Thermal sensor to monitor the PCB and case temperature on the USBHub3c during functional and validation testing. We used a similar software program as above but modified the max temperature and a few other parameters to better suit our needs on this deployment.
This allows us to push the device under test to its absolute thermal limit while keeping close control over the PCB and case temperature in an automated fashion. This saved our team time and gave us confidence that we could pass compliance testing for case temperature and overall unit temperature.

Conclusion:
Overall, we love the TeraRanger Evo Thermal sensors and use them frequently in our test systems. They are perfect when a full FLIR unit is too expensive or difficult to integrate, or when a single-point thermal sensor doesn’t sufficiently measure the desired area. The Evo thermal camera allows us to automate tedious tasks and saves our team a ton of time while ensuring our quality control is spot on and our units will meet all compliance requirements.
There are several other great applications for these low-cost thermal cameras.
If you’d like to test one out, you can order one now.
Add New Comment