USB-C-Switch Pro can log and decode USB Power Delivery messages inline between a real source and sink. That makes it useful for debugging charging behavior, cable capabilities, and negotiated power contracts without changing the basic source-sink interaction.
This walkthrough uses a 100 W USB-C charger on the Common port, an iPhone on Mux 0 through a USB-C to Lightning cable, and a control computer running HubTool over the USB Control port or Ethernet.
We will capture a full attach and negotiation sequence, then identify the charger's advertised power profiles, the sink request, and the final accepted power contract.
What you need
- USB-C-Switch Pro with the PD Logging feature enabled
- A USB-PD source, in this example a 100 W USB-C charger
- A USB-PD sink, in this example an iPhone connected through a USB-C to Lightning cable
- A control computer running HubTool, connected through the USB Control port or Ethernet
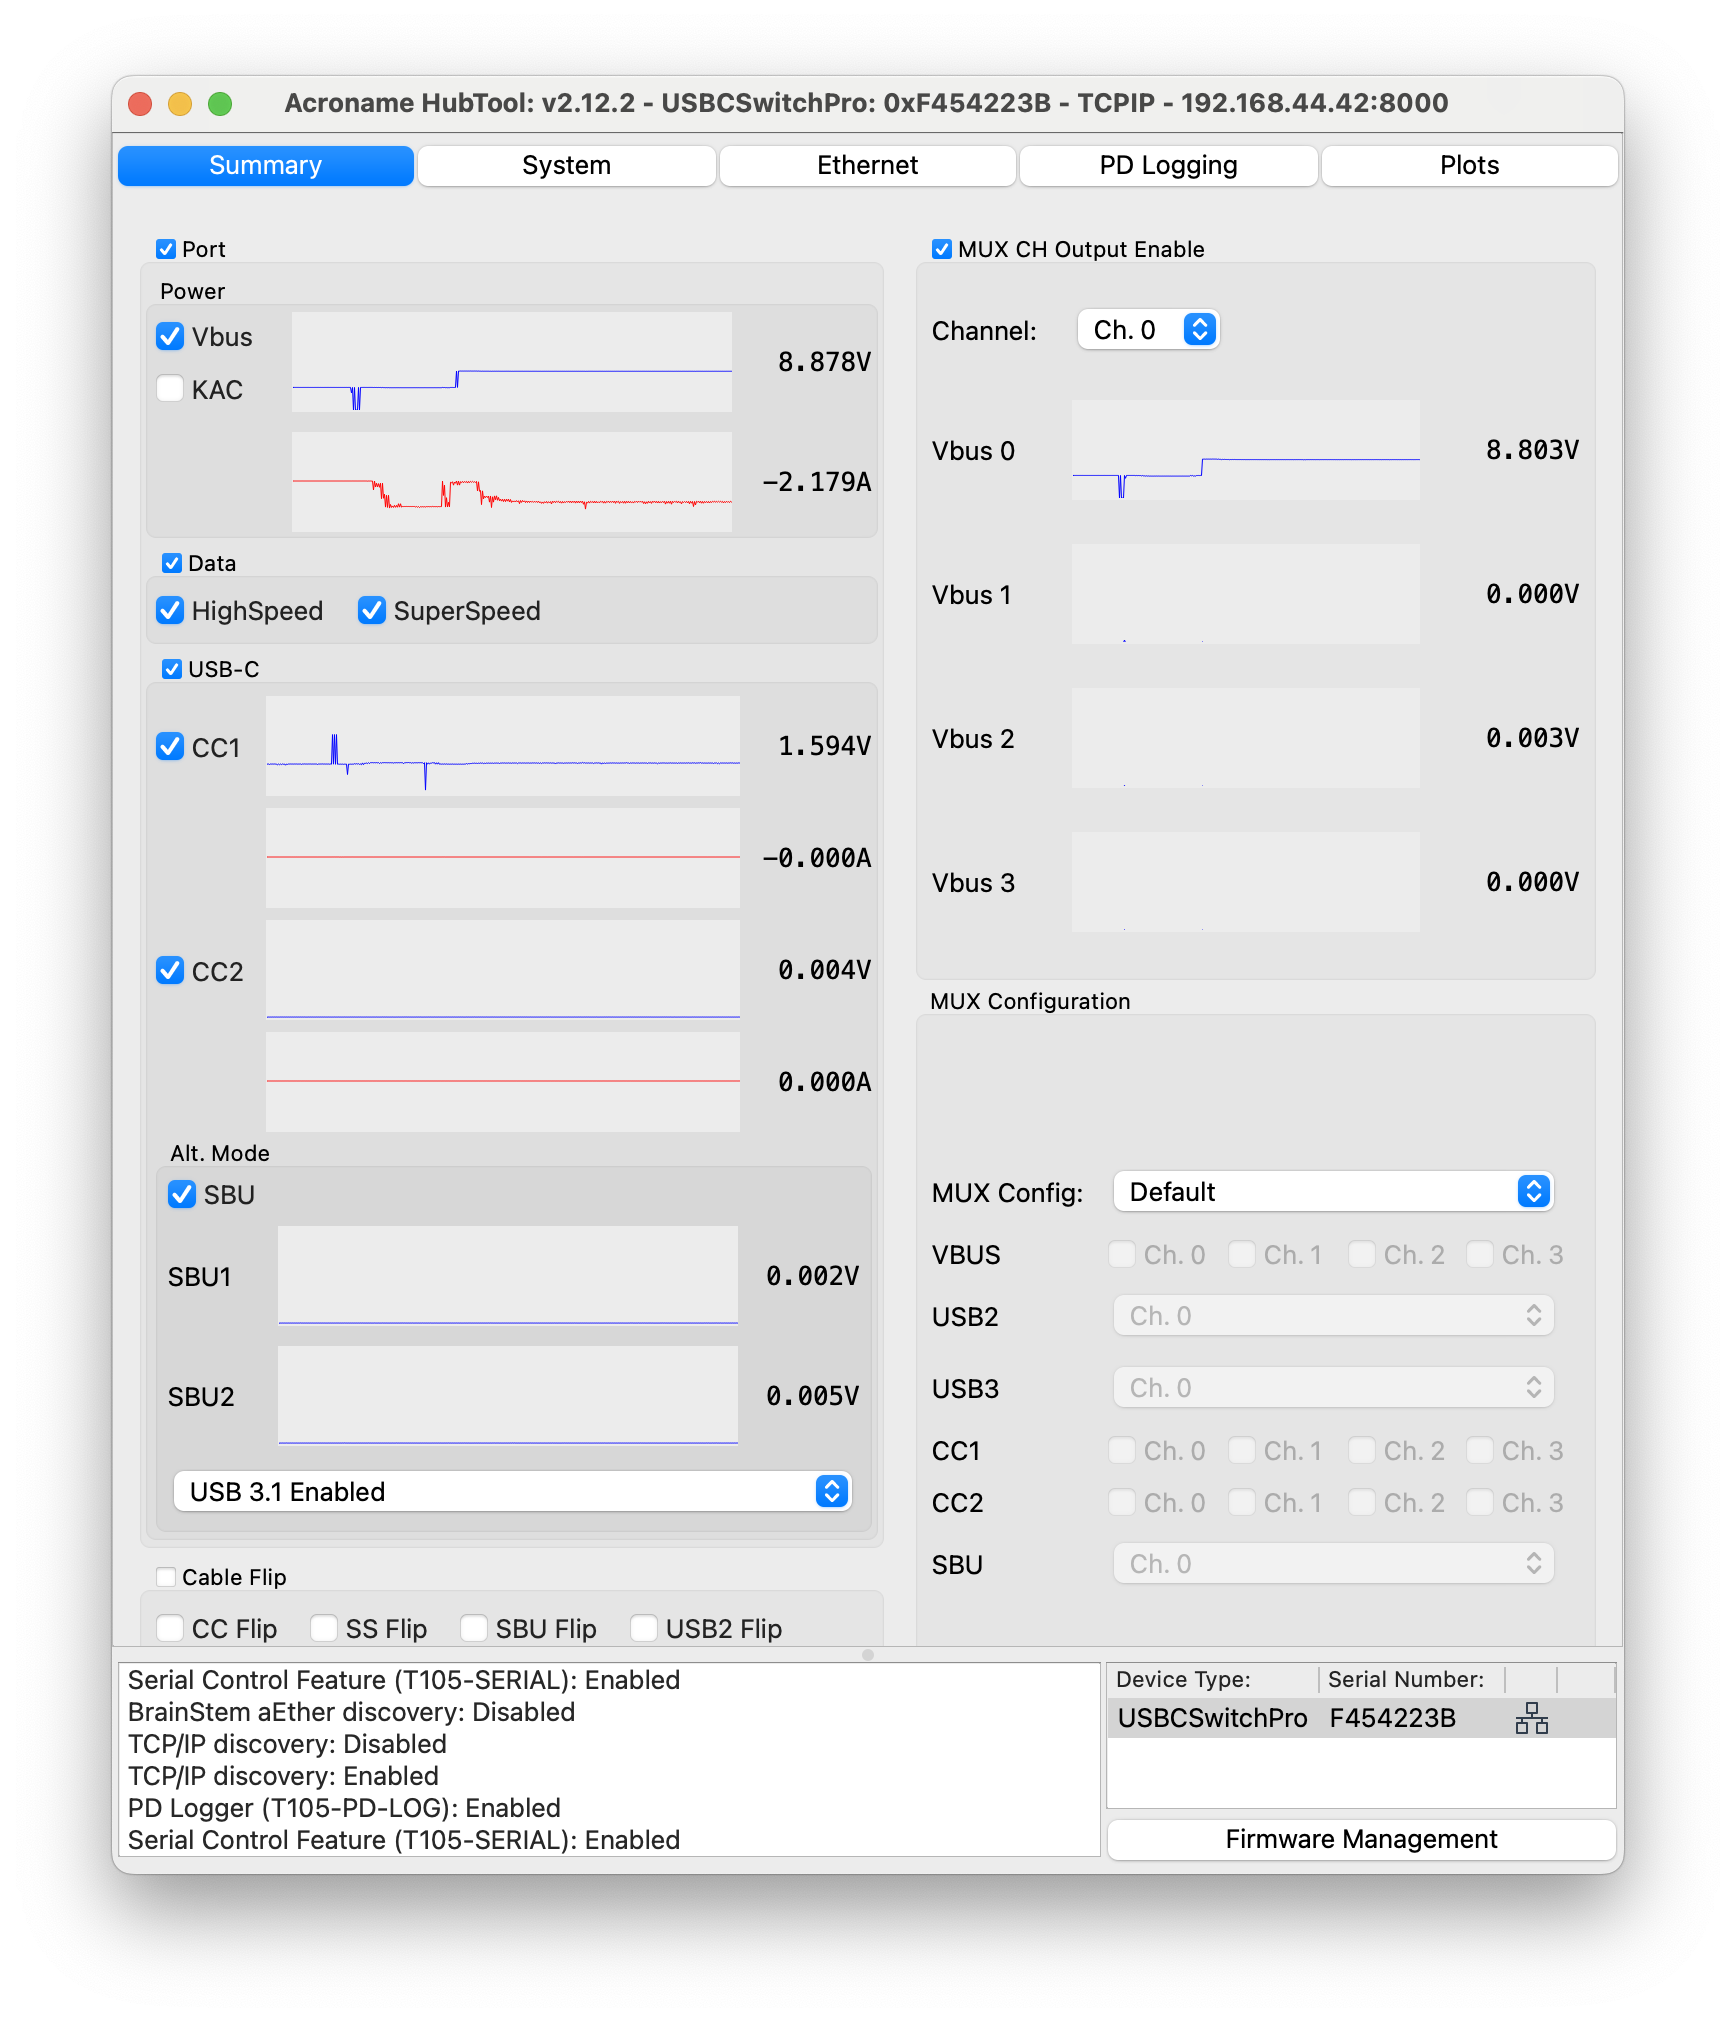
Setup
- Connect a power adapter to the switch DC power port.
- Connect the USB-PD charger to the Common port.
- Connect the iPhone to Mux 0 using a USB-C to Lightning cable.
- Connect the control computer to the USB Control port, or connect over Ethernet if you already have Ethernet control configured.
- Open HubTool and select the USB-C-Switch Pro in the device list.
- Select Mux 0 so that the Common port is connected to the phone on Mux 0.
- Confirm that the phone is charging. If it is not:
- Toggle cable flip in HubTool.
- Reverse the switch-side USB-C plug of the Lightning cable.
- Once charging is confirmed, disconnect the phone from the Lightning end of the cable. This gives you a clean attach event to capture when logging starts.
Start PD logging
- Open the PD Logging tab in HubTool.
- If messages are already present, click Stop and Clear.
- Click Start to begin logging.
- Reconnect the phone to the Lightning cable.
- Watch the log populate with the attach sequence and PD messages.
- Click any message to view its decoded contents.
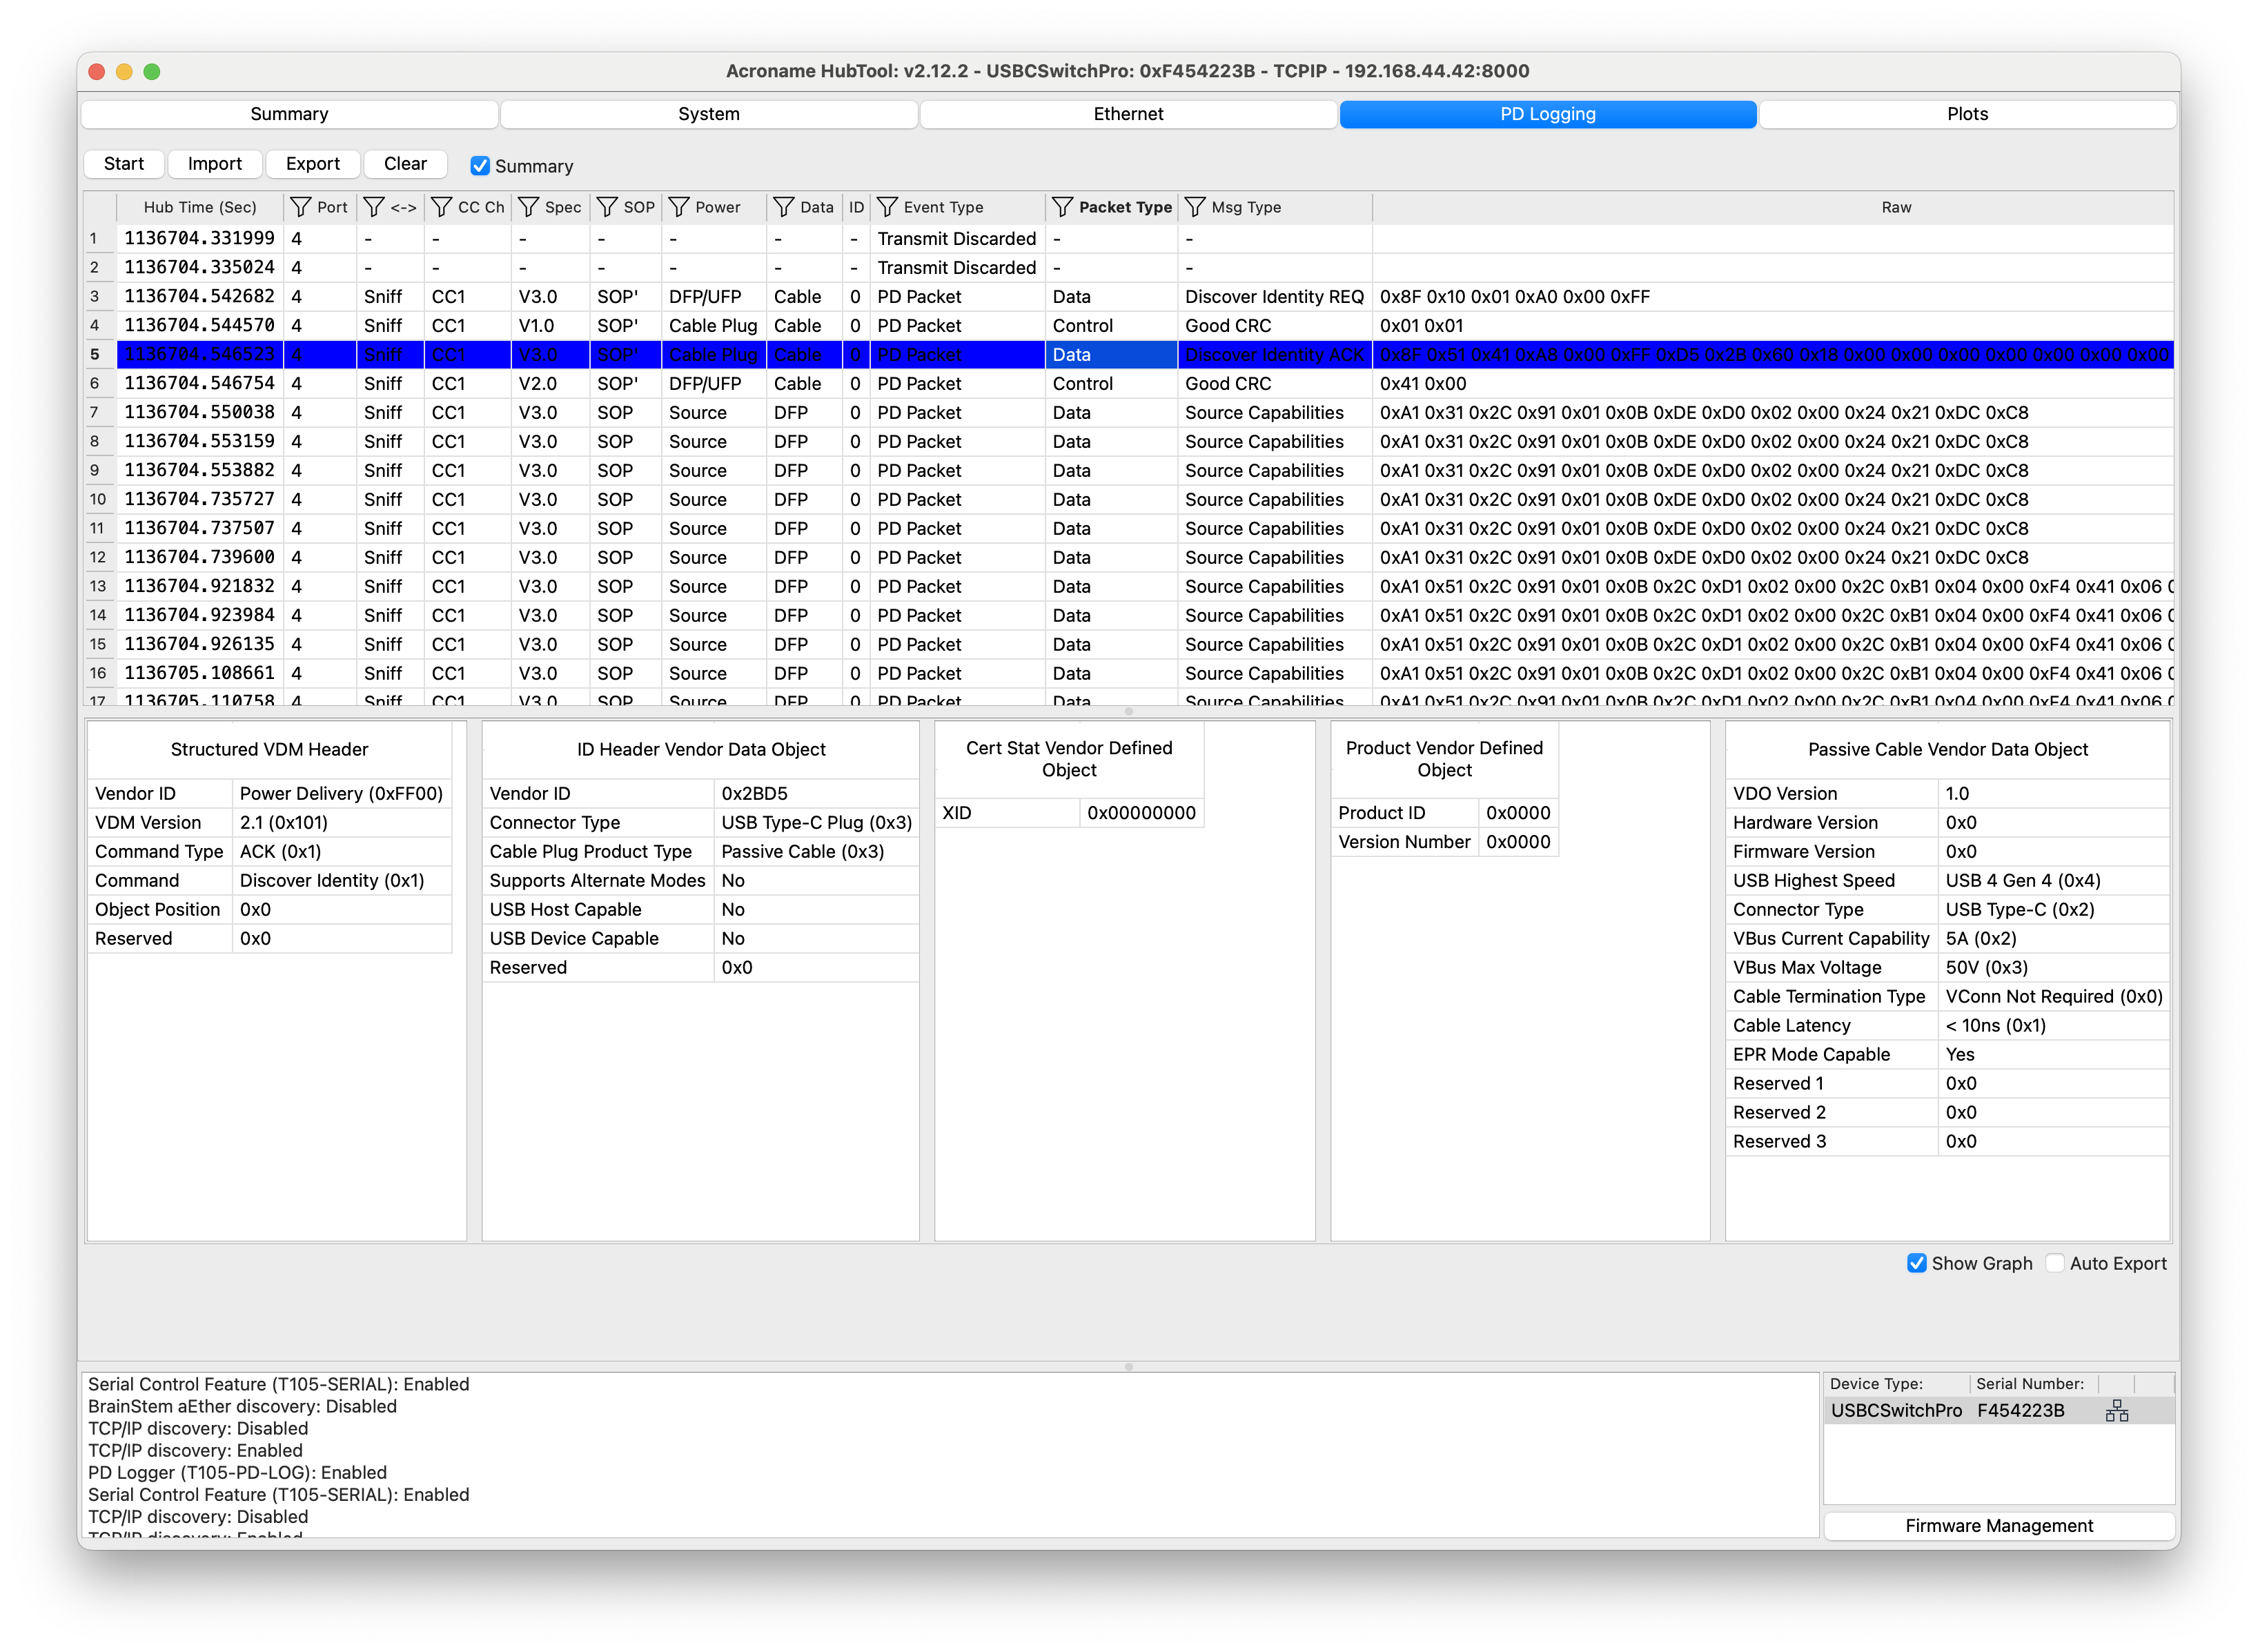
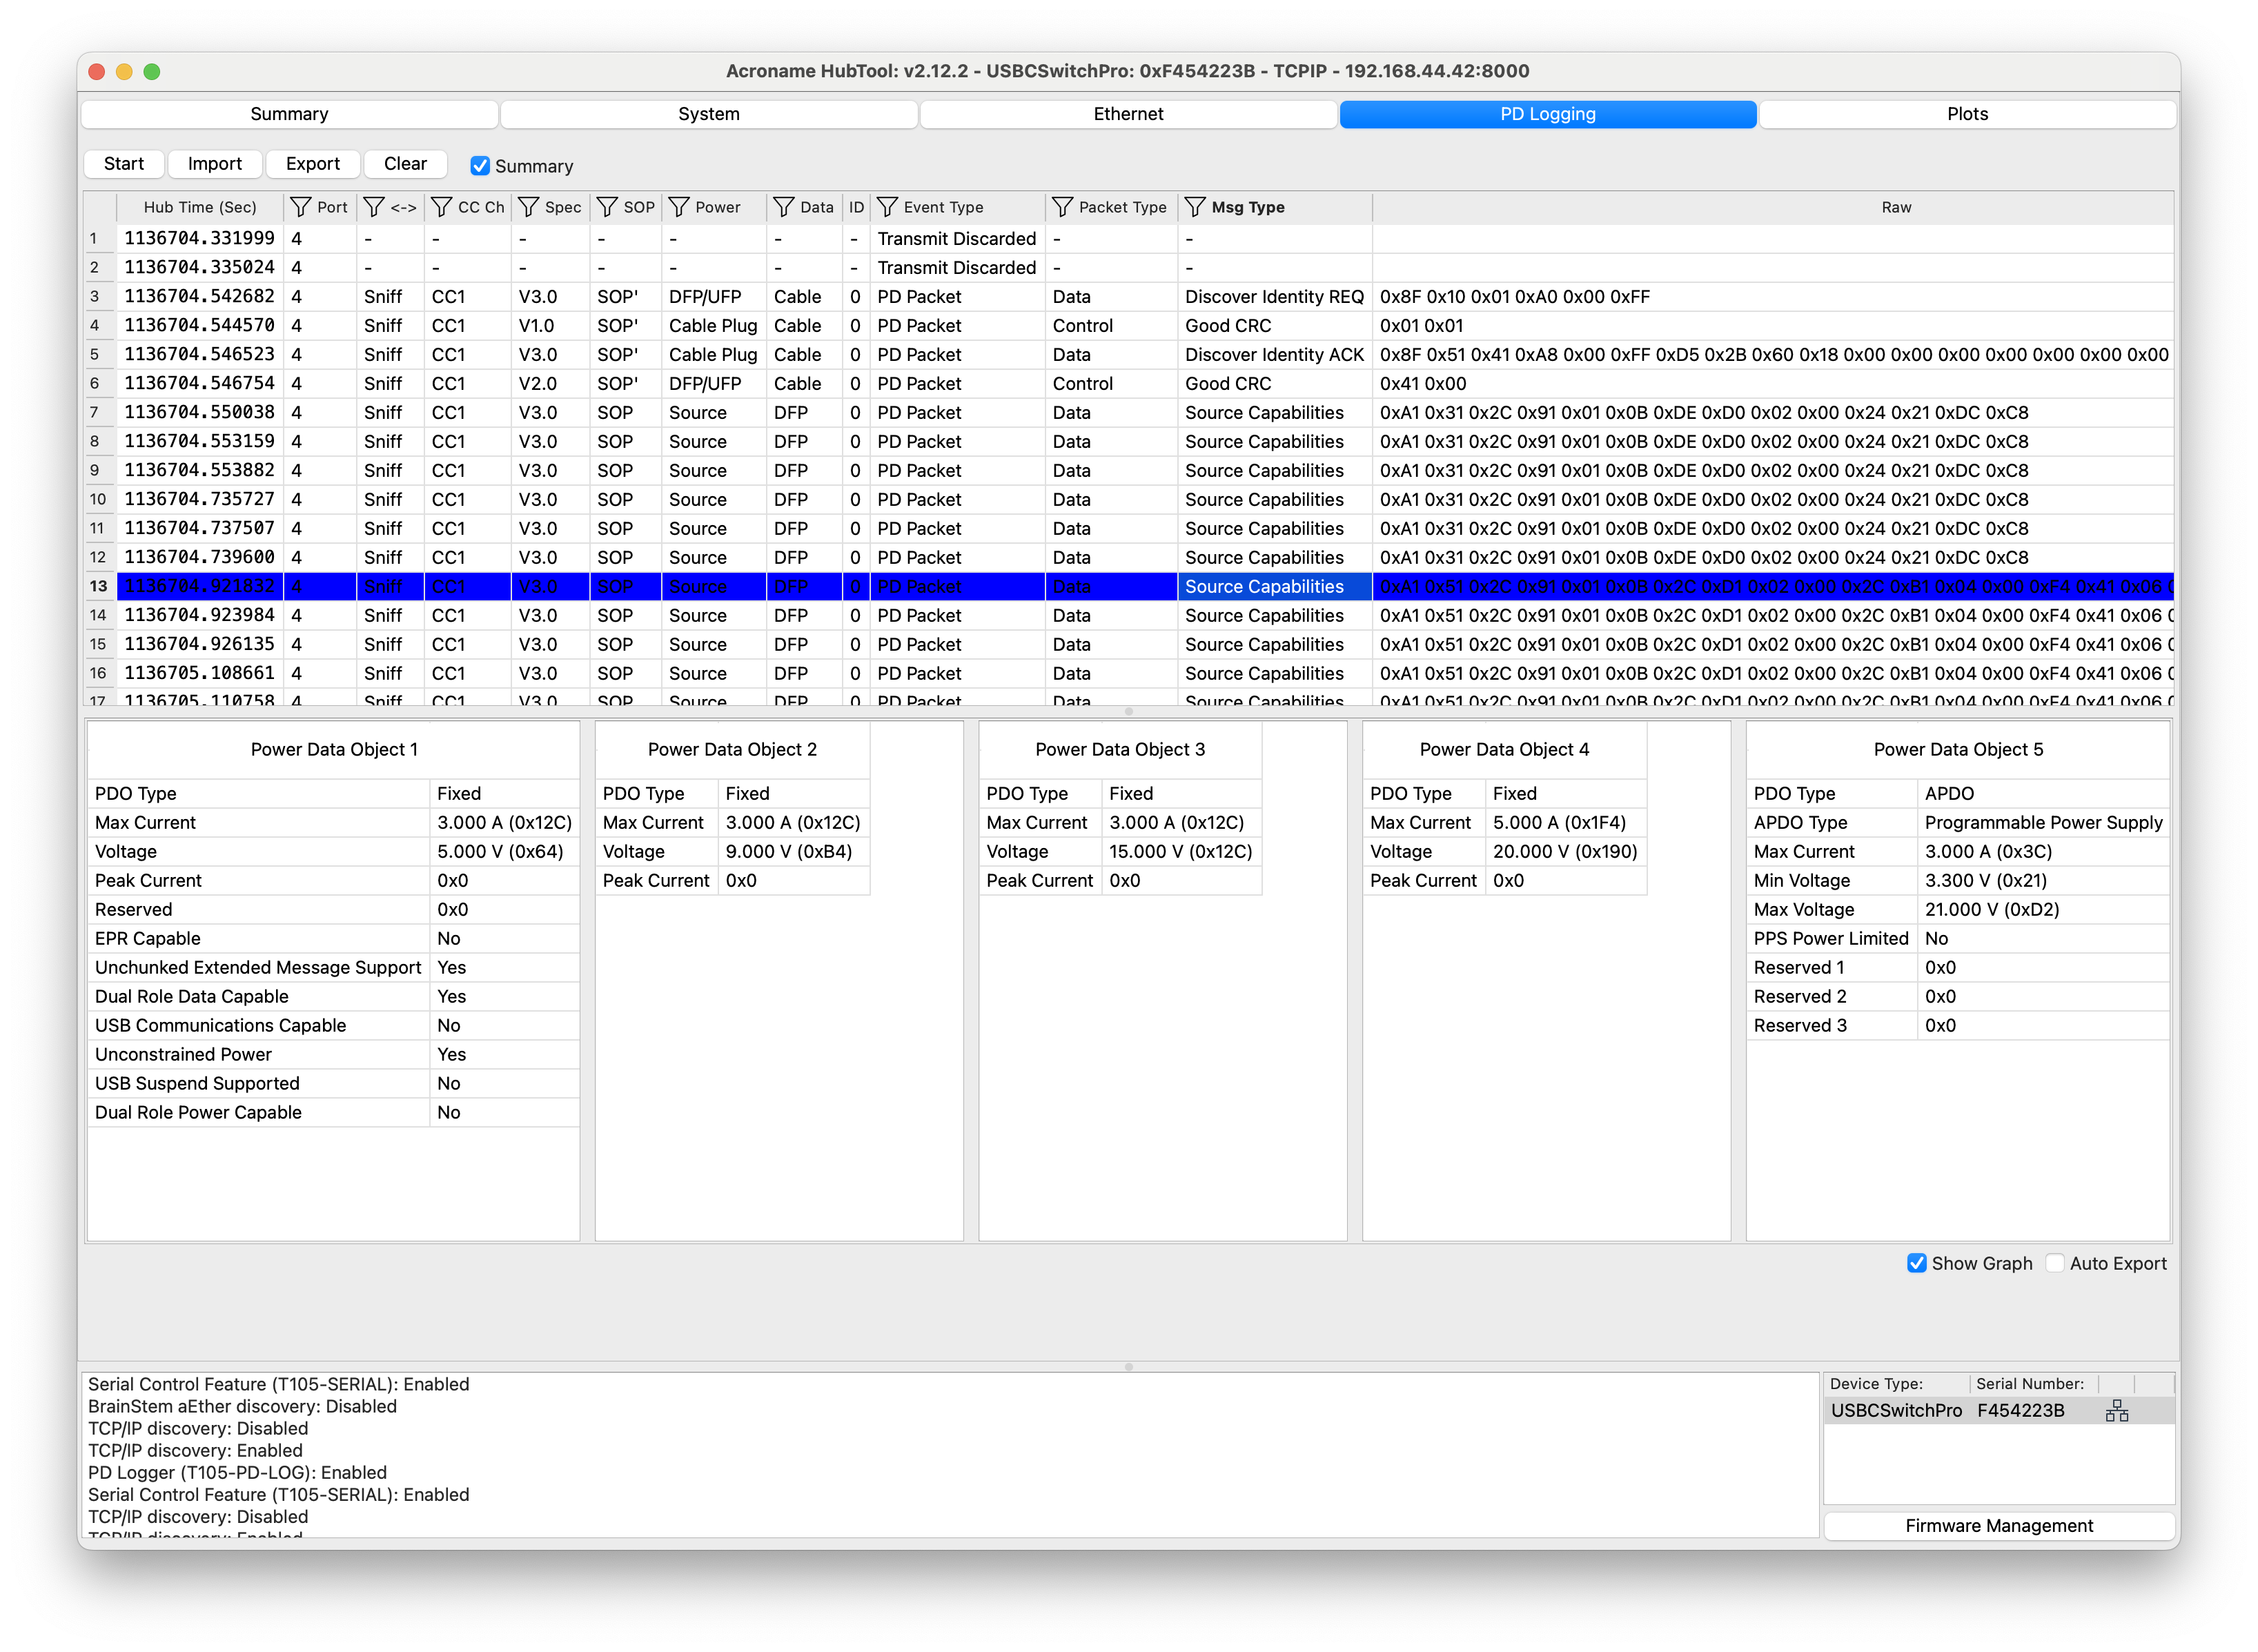
What you are likely to see
In this example, the capture includes several kinds of messages. We will look at three parts of the negotiation: cable identity, source capabilities, and the sink request followed by the source response.
With no cable on Mux 0, or with a plain USB-C cable and no device attached, the charger does not see a valid sink attach and no PD traffic appears. Plugging in the USB-C to Lightning cable causes the source-side CC voltage to drop to an attached-sink level. The charger then brings up the connection and begin PD and cable discovery. It sends a structured Vendor Defined Message (VDM) to the source-side cable to request the cable's identity and capabilities. The cable replies with a structured VDM reporting capabilities such as current support and maximum data rate.
You should then see the charger advertise its source capabilities. Depending on the charger, this may include a mix of fixed-voltage PDOs and PPS ranges.
For example, the source in this setup advertises:
- 5 V fixed
- 9 V fixed
- 15 V fixed
- 20 V fixed
- a PPS range
The sink then requests one of the advertised power profiles. In this example, the phone first requests 5 V and then requests 9 V.

The source then responds with Accept followed by PS Ready. In this example, that confirms the phone's request was accepted and the new power state is active.
Saving the log
Click Export to save the current log as a CSV file.
Saved CSV files can be reopened later in HubTool for review and decode.
If Auto Export is enabled, HubTool saves logs automatically to its configured export path. To see that path, hover over Auto Export.
Why this is useful
A simple capture like this can answer your PD questions quickly:
- Did the source advertise the power profiles you expected?
- Did the sink request the voltage or current you expected?
- Did the source accept the request and send PS Ready?
- Did the cable identity limit the available power contract?
- Did the negotiation complete?
For many debugging tasks, that is enough to go from "it's not charging" to understanding the root cause.
Add New Comment